When to Apply Varnish to Finished Model Aircrafts
What varnish is best for painted miniatures models? This is especially vital if you're a gamer because your models will be handled a lot. Your miniatures and sculptures will need to be varnished. You should varnish your miniatures to keep them safe. Varnishes also help you take better photos of your models.
When to apply varnish?
When building an aircraft model, applying varnish is usually one of the last steps. Certainly after putting the decals, so that they have the same finish as the rest of the model (matt, satin, gloss, or whatever). However, any glazing should be concealed until after the varnish has been applied and dried. Clear portions tend to be clouded by matte and satin varnishes.
Let's discuss about the procedures on when to apply varnish.
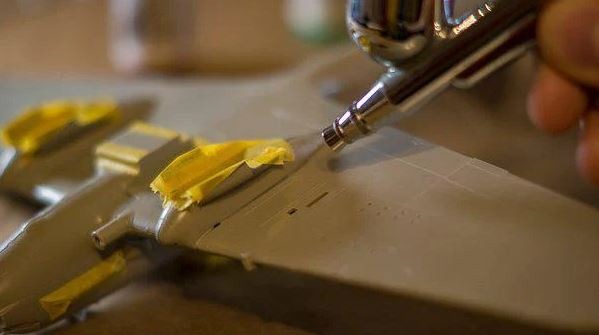
- Complete the model, removing any masking tape from the canopy.
- Apply a gloss varnish layer.
- Decal after it has dried.
- To your liking, apply a second coat of varnish (matt, semi-gloss or gloss)
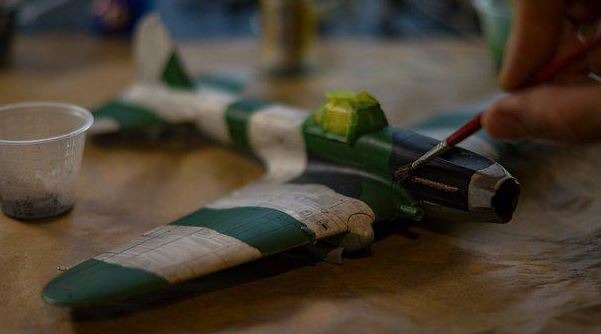
- Remove the masking before applying your weathering.
To tie it up with the decals and paints, shoot a clear flat over the final weathering. The only exception is if you're using pastels, as a clear coat would radically alter their appearance, even making them disappear.
Always test your varnish on a scrap piece first to see how it will perform. Some flat varnishes have a propensity to dry white or "foggy" over time.
Over acrylic finishes, use rattle cans of Testor's Glosscoat /Dullcoat, and Tree House Studios acrylics over enamels. This procedure protects the undercoat from the clear finish.
Preparation for Painting
The regulator on the compressor is should be set to 15-18 psi. This is an excellent pressure for applying paint to the model without it drying or splattering all over the place. If you're having trouble getting proper paint flow at this pressure, thin your paint.
Acrylics: Mix the pigmentation into the carrier with handy paint mixer, then pour whatever you need into a mixing cup. With Tamiya, Gunze Mr. Hobby/Aqueous, Italeri, Vallejo, Akan, and other acrylics, use a home-made paint thinner. This does not work with Acryl from Testors! You're ready to shoot once you've thinned the paint to the consistency of milk.
Enamels: 1/3 Testors Model Master Thinner, 2/3 Testors Model Master Enamels
Painting
Modelers use a variety of techniques and paint choices. Rather than attempting to quantify what others do, let me to provide my perspective as a modeler:
There are fundamental realities of painting models, regardless of the subject:
Matte paints are easier to apply and dry faster, but if decals are put directly over the paint, they will silver.
Gloss finishes are easier to work with while applying decals, but they take longer to dry.
Semi-gloss paints are an excellent compromise for decals applied directly to the paint, and while they dry longer than mattes, they dry faster than gloss hues.
Buffing
Smooth out the surface once the colors have been applied and the decals have been applied. First, buff the model smooth using an old t-shirt. Flat paint has a coarse texture that prevents decals from sticking without silvering. Buffing the paint smooth will improve its appearance and prevent the chance of it silvering. If you need to retouch anything because you buffed through the paint (it takes some getting accustomed to), do it once it has dried. Now take a whiff of the model. Set the paint alone for a few hours if it still smells wet. Buffering can reach places that aren't totally dry.
Gloss Coat
Apply a gloss finish to the entire model once it has dried. Make sure all windows, open interiors, and other open areas are covered first. Use transparent lacquers from Tamiya or Mr. Color, clear acrylics from Tamiya or Gunze, or Future Floor Wax. Dilute Future 50-50 with acrylic thinner prepared at home and apply it on the model. After it has dried, buff the clear surface again to remove any imperfections. Reapply the Future mixture until the gloss finish is uniform.
Decals
Use a decent setting solution to apply your decals. Microscale makes a good two-part decal setup solution that was once widely available in hobby stores. Make sure there is no silvering in the transparent edges of the decals once they have dried. Reapplying the setting solution to problematic areas usually solves the problem. Keep a bottle of Solvaset on ready for difficult decals. The most stubborn decal will usually adapt after a couple of applications.
Clean up any decal adhering that flow off the decals as they dry, then seal them with another gloss coat. After that layer has dried, I'll apply any matte or semi-gloss finishes that are needed before weathering the product. Seal the decals with a second coat of Future 50-50 mix.
What should I use to varnish?
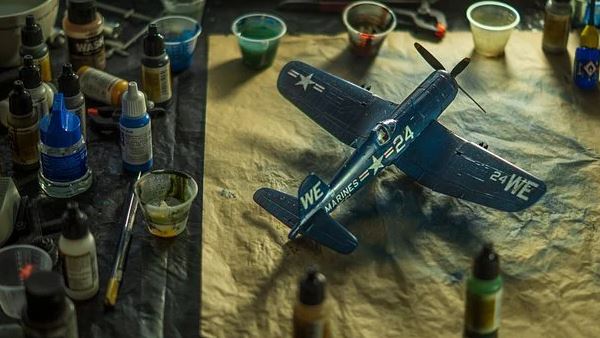
A satin or semi-gloss coating is ideal for a modern fast jet, yet the low-visibility grey appears almost matte. Go with varnish instead of PVA because even thinned PVA tends to go on unevenly and cloud. The Satin and Matt varieties of Humbrol Clear are troublesome animals because the matting agent has a bothersome habit of coming to the surface and leaving it yellowish.
Try enamel varnish. Aerosol varnishes may be rather good, but some use the Humbrol matt on some figures and ended up with a whitish coating on them, which looked good but not ideal for an airplane. The satin spray is excellent. On a waste piece of plastic, you might test multiple brands to find which one performs best. A tinlet of Satin Varnish (acrylic or enamel) costs no more than the paint, but it must be thoroughly mixed and diluted because the brush-painted version can leave a white residue.
Whatever brand you choose, make sure it's fully blended. To do this, I stir my paint using sprue pieces rather than shaking it and do not use Humbrol matt acrylic varnish of any kind. Lastly, make sure you follow the safety tips for making model kits.