How Are Resin Model Kits Made?
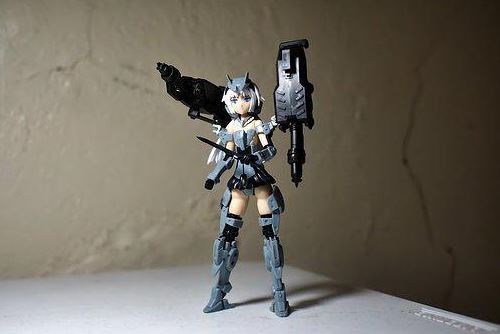
Resin kits differ from the styrene kits you're probably familiar with. Instead of polystyrene, these models are built of resin. Also, the methods of manufacture are substantially different. Resin kits aren't mass-produced in the same way that plastic kits are. Which is one of the reasons they are more expensive. You'll sometimes see them termed garage kits.
A resin kit will only come in one color, which is commonly white. As a result, they will require painting and gluing. On most components, they also require extensive cleaning. Flash and pinholes are common issues that must be addressed. And, because they're built almost entirely by hand, they lack the same level of engineering as modern Bandai kits. Almost all resin objects are individually handcrafted. They take a lot of time and effort to make.
The following is a step-by-step guide on making resin kits:
1. Getting to Know the Kit
The first step to success, as with any kit, is to comprehend how you'll get there. Any new kit should be thoroughly examined. Make sure you have all of the necessary components and read the instructions thoroughly.
Keep in mind that the majority of these businesses are small, with only one employee. These are modeler-made kits for modelers. A kit is frequently created because the creator wants one for their own layout.
2. Prepping for Assembly

To begin, the model must be well cleaned. A new resin kit's parts may feel slightly oily. Mold release agents are frequently found on the surface of resin kits. All of the mold spores must be removed. The pieces may be easily removed from the rubber molds thanks to a release agent. Any remaining release agent will prevent the paint from sticking to the surface.
Flash, or thin extra material around the edges of pieces, is a common problem with resin kits. It is not difficult to clean flash. Most flash problems can be solved quickly with a sharp hobby knife. A little file or emery board can also come in handy.
3. Gluing
Most resin kits can be put together with CA (cyanoacrylate). Most hobby shops carry this adhesive in a variety of viscosities. Smaller parts benefit with thinner CAs, which flow freely due to capillary action. When you don't want the adhesive to run, a thicker CA can help. Accelerants are also available to harden the glue quickly.
CA bonds resin to resin as well as metal to metal. Applying CA with a little micro-brush or a piece of wire is simplest for most sections. Pour a drop or two onto a scrap of plastic and transfer to the kit as needed. A small amount goes a long way.
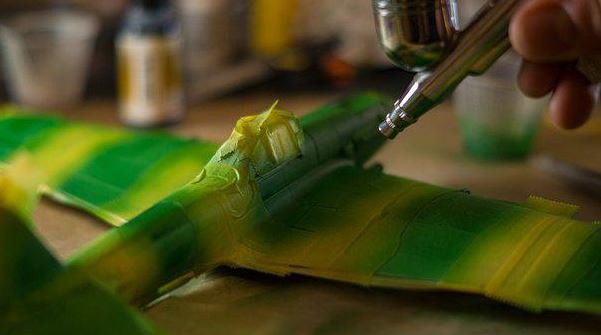
4. Painting
Only a few resin kits come painted. Painting models might be a difficult process for a novice, but it becomes better with practice, just like kit assembling.
Painting is normally done after the kit's main construction is complete but before the smallest details are added. This is especially true if lettering is needed to identify grab irons, ladders, and other items. Painting these pieces while they're still on the sprue may be the simplest option.
A mild wash to remove residue from casting as well as oils from your hands from handling the kit is always a good idea before painting.
A finish model is a direct indication of the quality of the labor that went into it before the final finish was applied. Any flaws that were overlooked during the construction process will be revealed by paint.
5. Decals
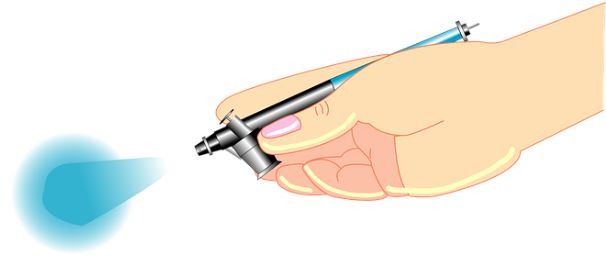
The model must now be prepared for decals. To get good adhesion, all decals require a flat surface. Flat paints, on the other hand, do not create a smooth surface. Gloss coating is required to give the model a smooth finish. A variety of industrial gloss coatings are available. To gloss coat the model, very light coats must be applied. It will run and produce huge streaks and pools if not applied lightly.
Apply the decals after that. Heat some water in a mug in the microwave after the decals are done. Warm, not scorching, water is required. To use the decals, soak them in warm water for 5-10 seconds and then set them aside. Apply a small amount of paint to the model with a brush. The paint will aid decal adhesion to the model and reduce silvering. When air gets trapped behind the decal, it causes silvering.
After all of the decals have been placed on the model, a decal setting solution can be applied to all of them. The decal setting solution softens the decal film, allowing it to settle into position.
6. Highlighting
The end is approaching! A wash is given to the model in the next stage to bring out the surface detail. To apply the wash, dampen the area where you wish to apply it with a dab of water first. Then, using a brush, apply the wash to the top of the model in small amounts, making that the wash settles within the panel lines. After the wash had dried, I went over the panel lines with a wet Q-tip to clear off any remaining wash on the model's surface. The model needs to be washed in portions. Repeat the process on the bottom after applying the wash to the top.
Spray the completed model with another very thin layer of paint to cement the wash and decals to the model. To allow the wash and paint to set, the model was left overnight.
7. Last Finishing
The shine finish was applied as the final stage. Apply thin layers of paint with a brush to achieve a good gloss. The sheen will take several applications to achieve. The model is finished now that the finishing coats have been done!
Conclusion
That's it! That's how resin models are made. Models made of resin are just that: models. In truth, the abilities required to construct resin models are essentially the same as those required to construct styrene models. The goal is to create a lovely model and demonstrate to others that resin sculptures are not scary.