What Types of Tools are Needed for Gunpla Building?
To protect your table from cuts, a large cutting mat is a useful accessory.
You can use a hobbyist toolbox, which has compartments for things like scissors, paintbrushes, and paint bottles.
You can keep your thinners and paints in one place while keeping your hand tools in a removable top section of the box.
1) The Bare Essentials
Nippers and a hobby blade are the bare minimum tools required for this hobby.
Nippers: Cut the parts from the runner using these nippers. Nippers come in a wide variety of styles, from affordable to expensive. You can use a nipper, which has a cutting edge that is thinner and produces flatter, cleaner cuts.
Removal of Nubs
Terms to Know
Runner: The material holding all of your gunpla components.
Gate: The runner component that leads directly to the designated gunpla part. Usually, two or three gates link the runner to the gunpla component.
Nub: The remaining gate after the runner is severed from the gunpla part.
1) Cut the gunpla part from the runner using a nipper, being careful not to cut too close to the gunpla part. White stress marks will appear on the gunpla part if you cut too close. Now that a sizable portion of the nub is still present on your gunpla part:
2) Cut off as much of the nub as you can with your nipper, leaving just enough to look like the image below:
3) Depending on the tools you have at your disposal, you can choose one of several options from here:
3-1) Making use of a hobby blade
Cut off the remaining plastic with a craft knife that is razor sharp. Just be sure to leave the actual gunpla intact. After that, simply scrape over the nub with the blade's flat edge.
3-2) Using a file
A few strokes from a file will quickly remove the remaining nub. On the gunpla part, however, there may be some scratch marks due to the quality of the file. In that case, sandpaper might be necessary:
3-3) Sanding with paper
Rough grit (200-400) should be used first, followed by intermediate (600-800), and finally fine grit (1000 or higher). Using double-sided tape, you can attach the sandpaper to a thick piece of plastic or even an ice cream stick.
Hobby blade: Because you can cut, trim, and scrape with it, it's necessary for this hobby. You may have a flat blade for certain circumstances. It is practical for removing melted plastic from fused seams.
2) Practical Tools
These tools are unquestionably useful for more than just snap-fitting, particularly if you like to modify, kitbash, or add details to your kit.
Cutting mat: A plastic modeler's equivalent of a cutting board. When cutting masking tape or plastic sheeting, the lines can be used as a guide.
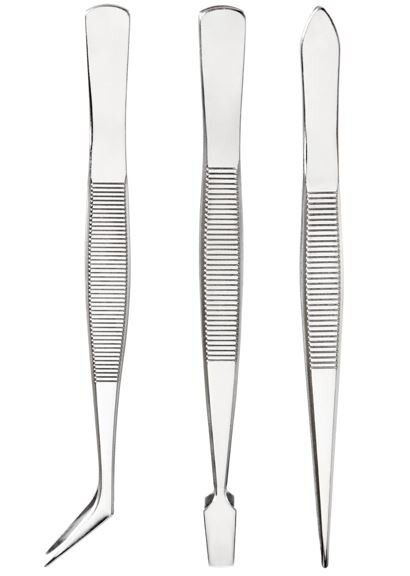
Tweezers: For handling waterslide decals and picking up delicate items.
File: Use the file carefully because it tends to leave unsightly scratch marks on the plastic. For larger surface areas, purchase a separate file, and a 2.8mm wide file is for those tight spaces.
T-ruler: To ensure a straight, 90-degree angle when cutting plate, a steel T-ruler is very helpful. combines well with the P-cutter.
P-cutter: It has a strange-looking blade and is similar to a hobby blade. Good for scribing panel lines and cutting thick plate, but primarily used for the former.
Modeling saw: A larger-toothed saw is used to cut larger pieces, but it produces rougher cuts. Making extremely accurate and clean cuts through plastic requires a saw with fine teeth and a very thin blade.
Pin vise: The pin vise can hold a chisel or scriber in addition to drill bits, which it is typically used for.
Drill bits: Have a set of drill bits with a diameter ranging from 1 to 3 mm. obviously used for drilling holes when used with the pin vise.
3) Consumables
Sandpaper: Comes in a variety of shapes and grits, from 200 (rough) to 1000 (slightly fine). There are a few precut strips and sanding sponges available.
Masking Tape: Masking tape comes in various sizes and is primarily used for masking. It goes without saying that you can simply cut one large one. Additionally, specialized tape is employed during scribing as a guide.
Plaplate: They come in all different sizes, shapes, and corrugated varieties. Additionally, there are those with printed grids for cutting precise shapes.
Putty: One of the best tools to have is putty, especially if you plan to modify or customize your Gunpla. Putty comes in three basic varieties: basic, polyester, and epoxy putty. Each has unique characteristics and uses.
Basic putty
Basic putty is grey and comes in a tube resembling one used for toothpaste. Of the three types of putty, this one is the softest and most malleable.
How to apply: Squeeze a small amount onto a mixing tray. For paints with a lacquer base, add a few drops of thinner and combine. Putty can be applied to the desired area using a toothpick or an alternative implement. Apply much more putty than you think is necessary because it tends to sink in as it dries. After it dries, scrape, file, or sand off any extra putty.
Useful for: Filling in tiny, shallow gaps and flaws, such as seam lines or scratch marks. It can also be used to make surfaces rough.
Not recommended: Filling significant gaps
Polyester putty
Two tubes are provided for polyester putty. The actual putty is in the larger tube, and the hardening agent is in the smaller tube. Its consistency falls somewhere between basic putty and epoxy putty.
How to apply: Putty (bigger tube) should be squeezed out onto a mixing tray. Squeeze out the hardening agent in a similar LENGTH (smaller tube). Use a toothpick to combine the two of them until the color begins to even out (same color with the putty tube cap). Apply it to your Gunpla while it's still a paste-like consistency. A word of warning: before it starts to harden, you only have 5 to 10 minutes to work with.
Leave the putty on for at least an hour after applying it (leave it overnight). Using a hobby blade, form to the desired shape.
Good for: Creating shapes and filling up large gaps. Using a hobby blade, cutting and shaping them is very simple.
Not recommended for: Joining pieces together. The hardening agent also has a slight odor.
Epoxy putty
Epoxy putty is comparable to Gunpla's duct tape. It comes in two separate strips of plasticine-like brown and white material.
How to apply: Mix equal portions of the white and brown components with your hands to create plasticine-like results. Putting on gloves might be a good idea because they can be a little sticky. Apply it to your Gunpla once the two components are homogeneous. Use a toothpick to nudge them into openings. Use a hobby blade to trim or shape it after it has dried. Despite being much harder than polyester putty, it is still controllable.
For: Creating shapes, bridging gaps, and filling large ones. Additionally, it has no smell
Filling tiny or shallow gaps is not recommended. There might still be tiny air pockets in the putty even after filling in significant gaps. You must use basic putty to cover those in this situation.
There you have it, then. Needless to say, priming and painting are required if you use any of these putties.
Glue: Plastic cement is used to join plastic components together, as its name suggests. It flows fairly easily between seams because of how thin it is. Additionally, there is regular cement, which has a thicker consistency.
Use super glue for non-plastic parts (such as resin or metal) or when you need a stronger bond.
Conclusion
Thus, these are the instruments used for assembling and customizing kits. If you're just getting started in this hobby, you don't need everything on this list; a good pair of nippers, a hobby knife, and some plastic cement will do.