Using Construction Paper to Create a Solar System for Young Children
It can be a daunting task when explaining the solar system and the universe to young children. However, finding creative ways to teach children about the planets early can excite their imagination and lead to a lifelong love of space. When teaching toddlers about the solar system, it's necessary to refresh your understanding of the solar system before you get started.
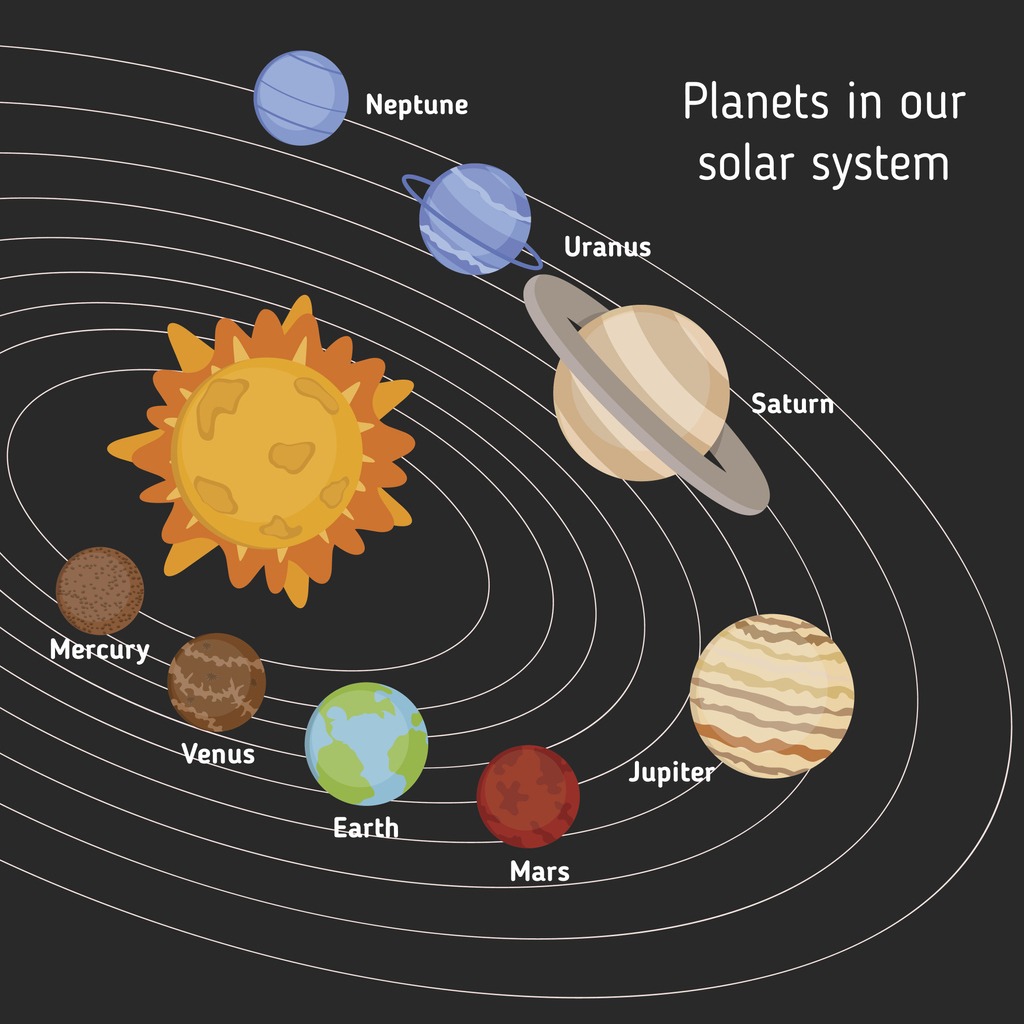
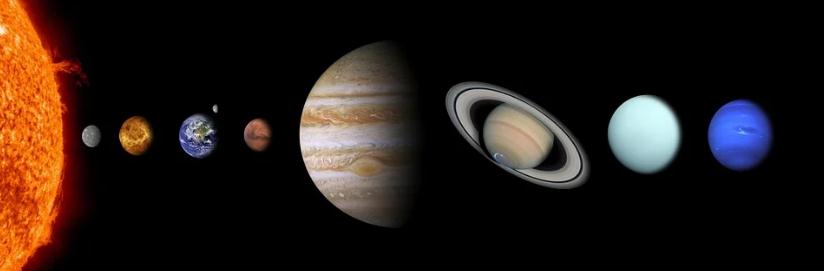
Six Milky Way solar system planets comprise the Milky Way's core: Mercury; Venus; Earth; Mars; Jupiter; Saturn; Uranus; and Neptune. In their orbit, these planets circle a star called the Sun. The Milky Way solar system also contains moons, comets, asteroids, and dwarf planets known as Pluto. There are roughly 30 billion solar systems in the Milky Way alone and billions more galaxies beyond that. Please start with the eight planets in our solar system and the Sun to help toddlers better understand numbers.
Ways of Introducing the Solar System to Young Children
Introduce them to the night sky and the moon.
The best method to introduce toddlers to the concept of astronomy and the planets is to show them the night sky and the moon. Please point out the stars and speak about how they're from Earth on a clear night. Invest in a telescope and observe the night sky from an upper floor window if you want a better view. Specify a variety of stars, such as the brightest or tiniest, for the children. You can take your child to a planetarium if you live in a city and can't see the night sky. ' an excellent visual and interactive introduction to the concept of space and planets can be accomplished through this medium. Planetarium kits are also available for purchase, which project constellations onto the ceiling and show children how the planets and stars move across the night sky.
Create a model Solar System
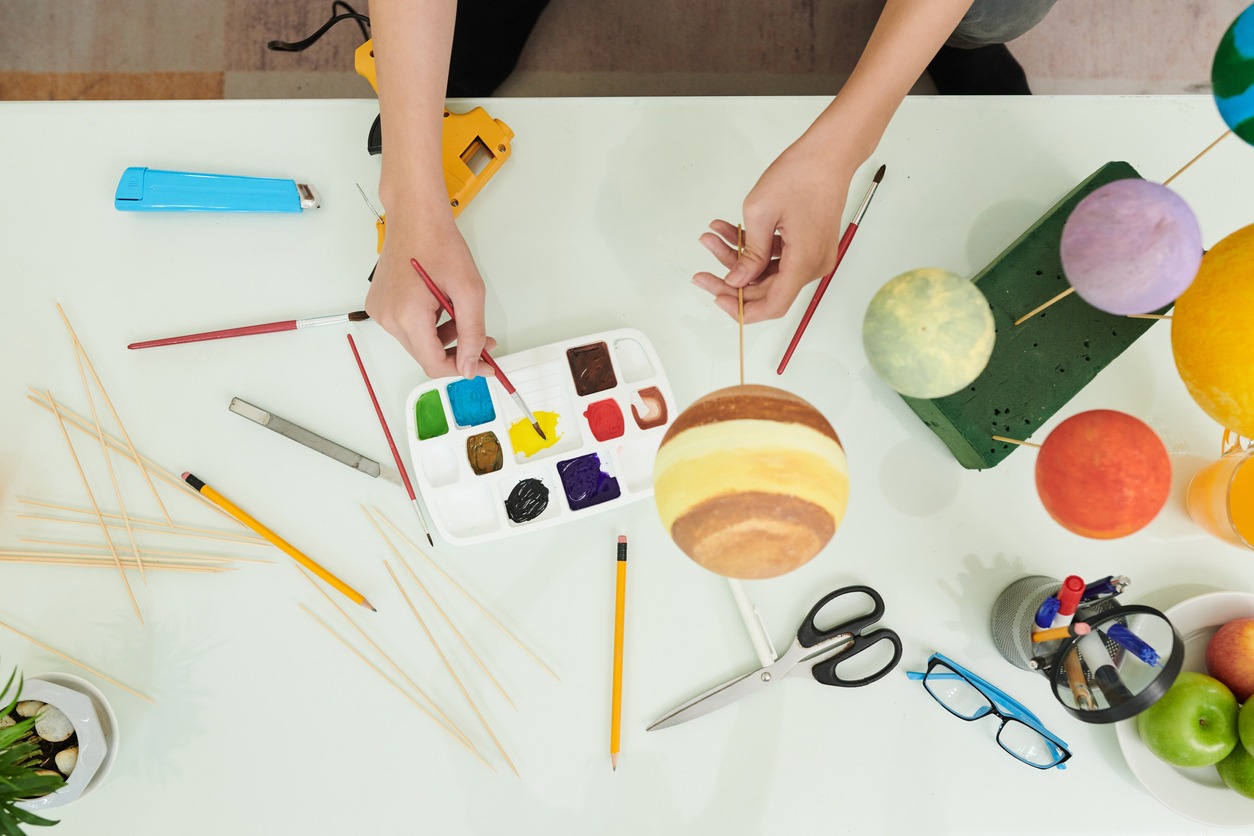
You may create your planets with some simple crafting. Cut out and stitch together felt circles make soft planets, which can be used to teach your child the names of the planets and the order they're in.
If you don't have a printer, you can print out a large piece of card stock and have your kids color it with paints. To hang them from a ceiling or attach them to a wall, cut them out to the desired size and arrange them in the correct order. Toddlers can add stars and planets, and the planets' names can be labeled. Participating in the making process will aid in retaining information such as the sizes and names of several worlds. Try constructing the planets to scale—Jupiter is so enormous you could fit all the other planets in the Milky Way inside of it—these are vital concepts for kids to grasp.
How to Make Solar System Model Using Construction Paper
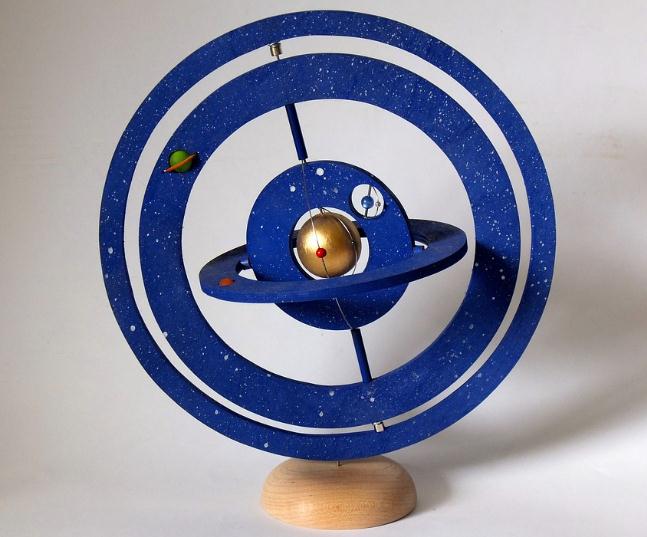
Teach children about the planets using a cardboard and construction paper model of the solar system. If your goal is to engage children who like to learn by sight and touch, consider making a three-dimensional duplicate of the real object. A three-dimensional solar system model can better visualize each planet's size and properties. Students will better understand how the planets move around the Sun during this lesson.
You'll need the following items to complete this task: A string of a 20-inch length was used for this project, Construction paper in many colors, a large cardboard sheet, Permanent ink in black color, a Ruler, Scissors, and Tapes.
Step 1: One foot of cardboard should be marked with a ruler and pencil. Once you've found the center, draw a second one-foot line parallel to the first one, running perpendicular through the intersection of the two. A cross-shaped drawing is what you need.
Step 2: Draw a circle around the cross to connect the four lines. With a pair of scissors, cut out the shape.
Step 3: Make four concentric circles inside the cardboard circle, allowing about a 1-to-2-inch gap between each. Each of the five outermost planets will have its unique path.
Step 4: Create a second one about 4 to 6 inches in diameter within the smaller circle. Where the asteroids go around the Sun is depicted by the wider chasm.
Step 5: Leave about 1 to 2 inches between the three other circles you've drawn inside the smallest circle. Now that you've created a more significant gap and four smaller processes closer to the cardboard's center, you should have four loops around the cardboard's edge.
Step 6: Cut a huge circle out of yellow construction paper to represent the Sun. The most giant planet in your solar system should be the Sun.
Step 7. Using red construction paper, cut out the shape of Mercury's moon, Mercury. Ideally, this is the tiniest of your planets.
Step 8. Using two sheets of white and blue paper, cut out a circle three times the diameter of Mercury. In this case, white represents Venus and blue Earth. Both are the same height.
Step 9: Construct an Earth-Venus-Mercury-sized circle out of red construction paper using this formula: This will serve as a representation of the Red Planet.
Step 10. For Jupiter, cut out a substantial brown construction paper circle with scissors. Despite its size, it is still smaller than the Sun; thus, it should be your most giant planet.
Step 11. Make a pink or purple circle slightly smaller than Jupiter symbolize Saturn. Make Saturn's rings out of extra strips of construction paper and stick them to the process with some glue.
Step 12: Using dark blue and green construction paper, cut out two circles somewhat larger than the globe's circumference. Uranus will be represented by green, while a dark blue hue will represent Neptune.
Step 13: A purple circle around the size of Mercury's ring will represent Pluto.
Step 14: Each planet's name should be written in a permanent black marker on each circle.
Step 15: String the planets and the Sun together with a string. Apply adhesive to the strings and proceed to position the worlds in their respective orbital circles at various points along their trajectories. First, Mercury should be attached to the Sun, then Venus, Earth, Mars, Jupiter, and Saturn. Then, Uranus, Neptune, and Pluto should be taped to the last orbit circle.
Step 16: Using masking tape, put three equal-length lengths of string around the cardboard's perimeter. Bring the ends together, tie them together, and secure them with another piece of string so your model may be hung.
There are also other ways to learn about the solar system using colorful construction materials. Another way of presenting the solar system to your kids is by creating a wall-hanging solar system.
Make Fun Learning by Incorporating Some Nursery Rhymes
Using nursery rhymes as a teaching tool is always a good idea for toddlers. Children retain information better when it is tied to a specific song. Teach your children the Planets Song after watching this movie with them to get their interest in the solar system peaked. When new knowledge is given in a way that is both informative and interesting, children are more likely to retain it.