Are Dioramas Hard to Make?
Dioramas aren't hard to make once you know the basics. You'll need simple materials like foam board, glue, paint, and miniature elements that you can find at local craft stores. Start by choosing a theme and planning your scene carefully. While creating realistic backgrounds and working with tiny pieces might seem challenging at first, you can become proficient in these skills step by step. Follow proper techniques and guidelines to alter your creative vision into an impressive miniature world.
Understanding Basic Diorama Components
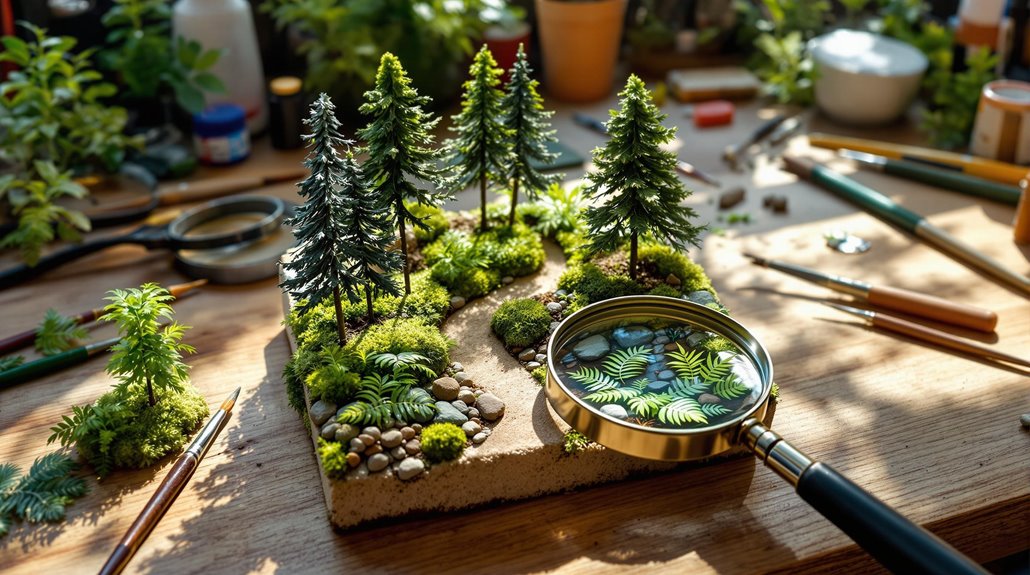
While dioramas may look complex at first glance, they're built from several straightforward components that work together to create a miniature world. The foundation typically starts with a base made of foam board or extruded polystyrene, which provides a sturdy platform for your scene.
You'll need to create a backdrop that sets the mood and environment, usually through painted scenery that curves gently to establish viewpoint.
In the foreground, you'll arrange your miniature elements, securing them with white glue or other appropriate adhesives. The key is layering your components from back to front, creating a sense of viewpoint and dimension. Whether you're crafting terrain, positioning figurines, or adding decorative elements, each piece contributes to telling your story in three-dimensional space. Expanded polystyrene foam materials like Styrofoam balls can be easily cut and shaped to create unique landscape features and structural elements for your diorama.
Essential Tools and Materials
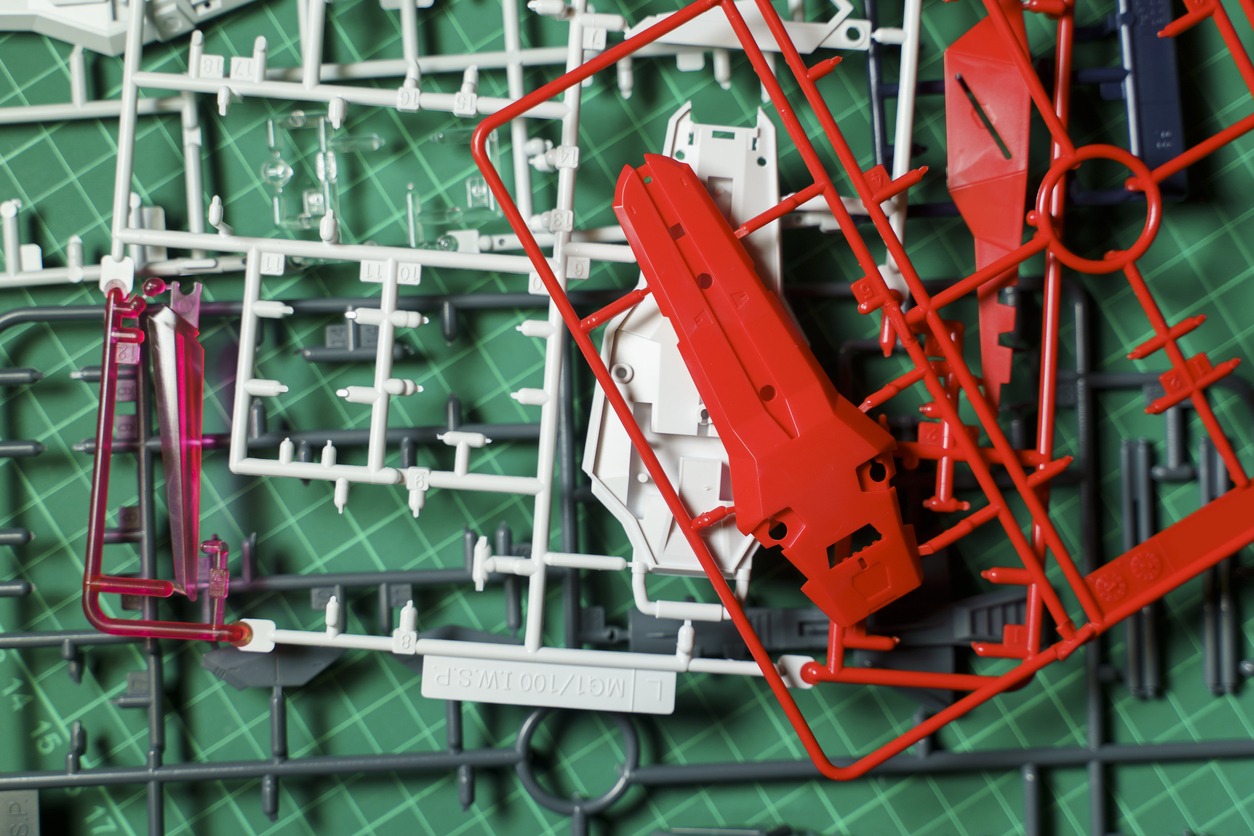
Getting started with dioramas requires surprisingly few tools and materials, most of which you can find at local craft stores or hardware shops. You'll need basic items like a utility knife, ruler, paint brushes, and pens to bring your real life scenes to miniature form.
For your core materials, you'll want:
- Polystyrene foam (specifically extruded type) for easy shaping and detailed sculpting
- Construction paper and white glue for basic structures and surfaces
- Acrylic paints and Mod Podge for finishing touches and durability
The wide range of affordable materials means you can scale your project to fit your needs. Don't worry if you can't find exact materials - local alternatives often work just as well. These basic supplies will give you everything needed to start creating impressive miniature scenes. Using a cutting mat will protect your work surface while ensuring precise cuts for your miniature elements.
Planning Your First Scene
Before diving into construction, proper planning makes all the difference in creating a successful diorama. First, select a box or container that'll serve as your foundation, keeping in mind the scale of your project.
When you're ready to make a diorama, start by choosing a specific theme that interests you - whether it's a historical event, nature scene, or fictional setting.
To create a diorama effectively, research your chosen subject thoroughly and sketch out your design. This blueprint will help you visualize how different elements will fit together. While building a diorama, consider the observer's standpoint and plan your scene's depth accordingly. Map out where you'll place key features, background elements, and focal points. Remember to leave enough space for all components and consider how lighting might affect your final display. Using fine-grit sandpaper will help achieve smooth surfaces on any styrene components you incorporate into your scene.
Creating the Background Elements
Since the background sets the stage for your entire diorama, it's essential to create an influential environment that captures your scene's mood and setting.
When creating a diorama, you'll find that natural elements like cotton balls for clouds or twigs for trees can alter a simple backdrop into a lively scene.
You make your background come alive by following these key steps:
- Paint your backdrop using colors and textures that match your theme
- Layer materials at different depths to create dimension
- Add found objects and natural elements to enhance realism
This process doesn't have to be complicated - focus on creating elements that support your main scene. By carefully selecting and arranging background materials, you'll establish the perfect foundation for your diorama's story to unfold.
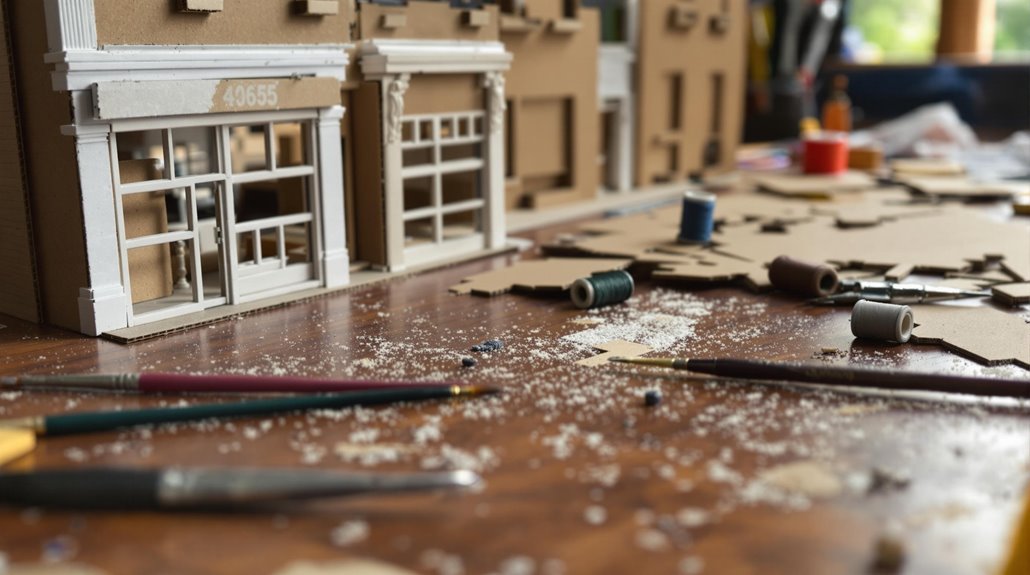
Working With Different Materials
While each diorama material presents its own unique challenges, commanding their properties will help you create more realistic and engaging scenes. When you use different materials like paper, cardboard, and modeling clay in your small diorama, you'll need to become an expert in specific techniques for shaping and securing each element.
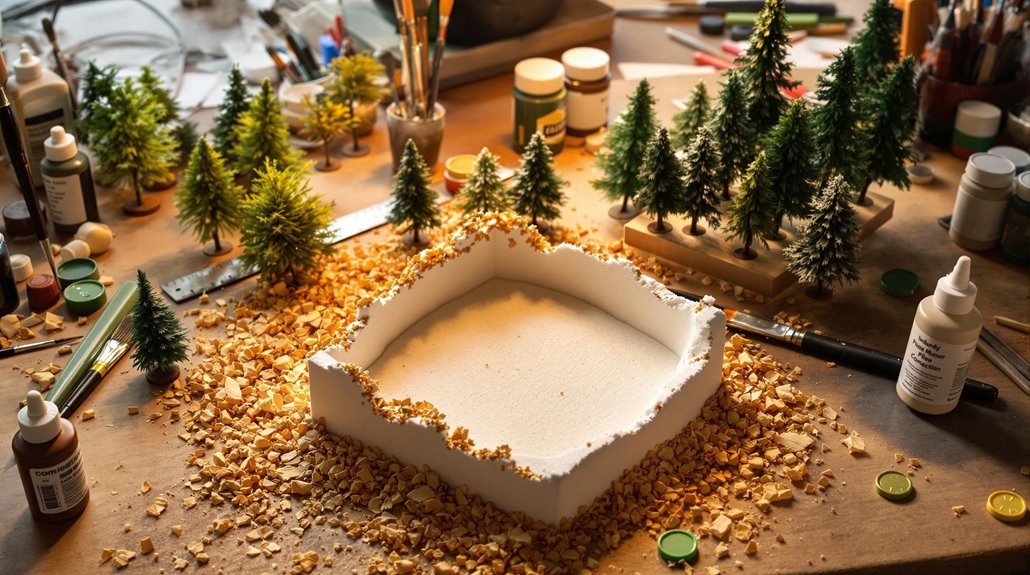
Extruded polystyrene foam makes an excellent base, but you'll want to glue it to wood for stability. To make it look natural, apply acrylic paints in careful layers, blending colors to achieve realistic textures. You can create depth by adding flocked grass tufts and modeled trees in strategic layers.
When incorporating water features, you might need to experiment with various materials like resin or floor wax until you find the right combination that delivers the clarity and depth you're seeking.
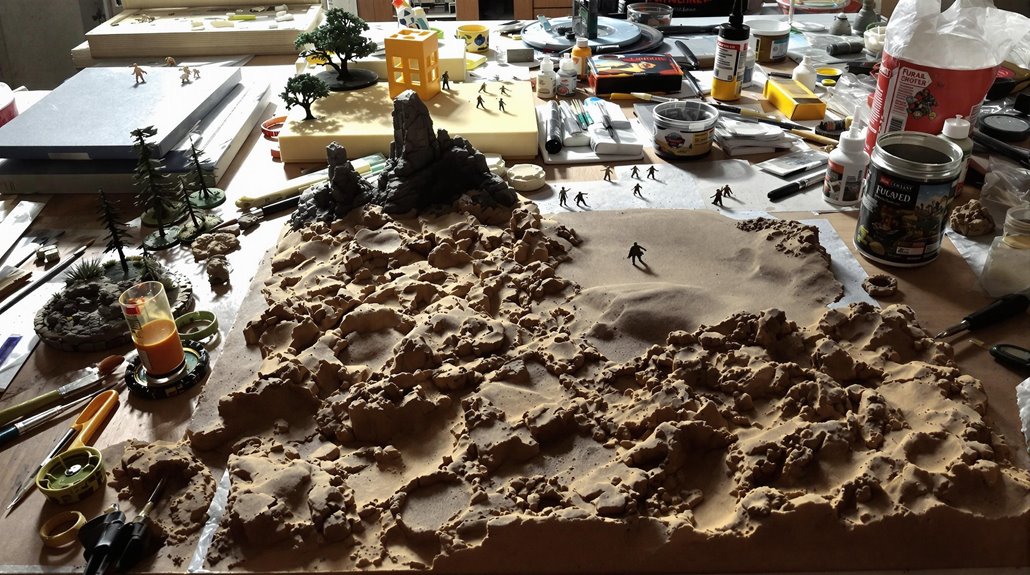
Building Depth and Dimension
Creating depth and dimension in your diorama modifies a flat display into an immersive, three-dimensional world. Whether you're working on a school project or trying to create a realistic scene, layering elements at different depths will enhance your final product.
To achieve an impressive overall look, follow these key techniques:
- Position foreground objects closer to the viewer while placing background elements farther back to establish a natural sense of distance
- Incorporate angled surfaces like pathways or roads that draw the eye deeper into your scene
- Use forced perspective by making background objects slightly smaller, creating the illusion of greater space
Remember to vary the heights of your terrain, buildings, and other features. This multi-layered approach reshapes your diorama from a simple display into a mesmerizing miniature world.
Adding Details and Textures
The art of adding details and textures modifies a basic diorama into a rich, lifelike scene. You'll want to start with the bottom of the box by applying sand or gravel to create realistic ground textures. Adding dried plant materials and small twigs will make the scene more authentic and natural-looking.
Don't forget to incorporate miniature elements like tools or furniture to tell your story. You can create depth by layering different paint shades and using dry brushing techniques to simulate weathering effects. Playing with lighting and shadows will bring your creation to life, while reflective surfaces add an extra dimension of realism. Whether you're crafting an animal habitat or historical setting, these small details will convert your diorama from basic to extraordinary.
Common Challenges and Solutions
Making dioramas comes with several common obstacles that can test your patience and skill. When you're making a diorama, you'll likely face challenges with scale, materials, and structural stability. The first step is recognizing these difficulties so you can plan accordingly for your final piece.
Creating realistic terrain and backgrounds that maintain proper viewpoint and depth
Working with tiny elements like figurines and accessories while keeping everything properly scaled
Conquering specialized techniques for effects like water features and lighting
To tackle these challenges effectively, start small and gradually work your way up to more complex projects. Focus on perfecting one technique at a time, and don't hesitate to experiment with different materials and methods.
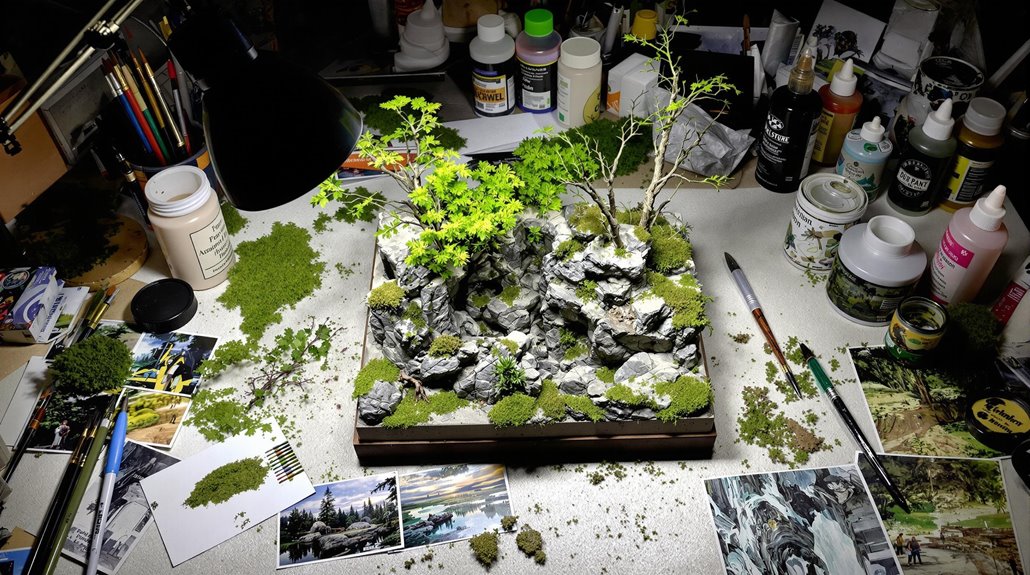
Tips for Realistic Scenery
Realistic scenery forms the backbone of any engrossing diorama, and you'll need to focus on both materials and technique to achieve convincing results. Whether you're working with a shoe box or something else, start by creating natural textures using extruded polystyrene foam and thinned white glue mixtures for soil effects.
When adding vegetation, layer your foliage from light to dark to create depth. You'll want to use no more than 50 shades of green to maintain authenticity. For the finishing touches, incorporate Noch grass tufts and apply enamel paint washes to add color variation.
Even if you already know what a diorama should look like, remember to avoid parallel elements by rotating and angling components. This simple trick adds visual interest and prevents your scene from appearing artificially uniform.
Finishing Techniques and Display
Once you've perfected your scenery elements, proper finishing and display techniques will bring your diorama to life. Whether you're recreating a scene from a book or showcasing historical events, your first step is to decide how to secure everything permanently. Use hot glue to guarantee all pieces stay firmly in place, and consider adding supports for heavier elements.
To protect your work done and create a professional finish:
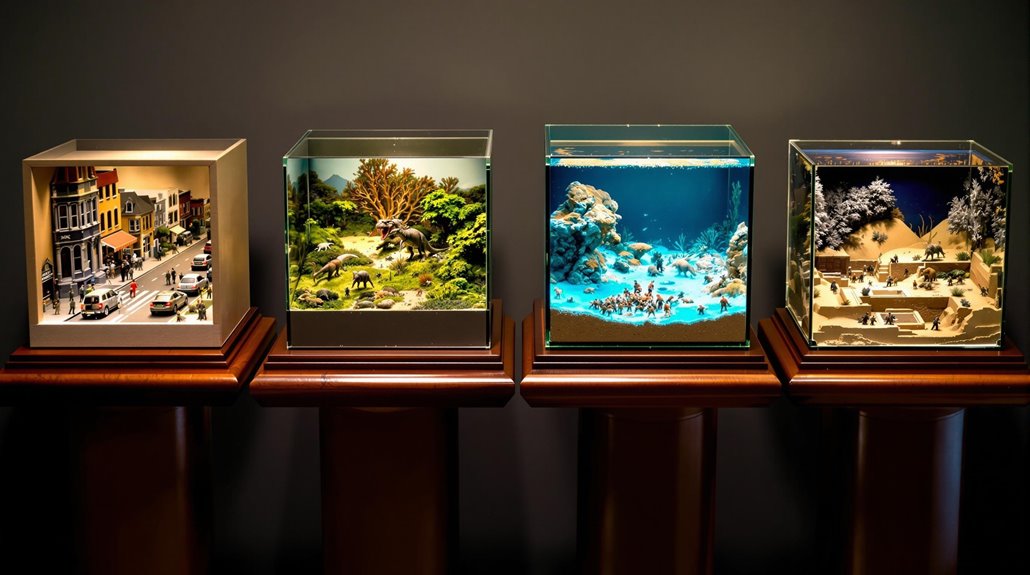
- Install miniature LED lights to highlight key features and create depth
- Add informative labels or captions to explain the story behind your creation
- Place your diorama in a protective display case or frame to prevent dust and damage
Don't forget to photograph your magnum opus from multiple angles before final display - this will help you document all the intricate details you've carefully crafted.