Guide to Model Train Scenery
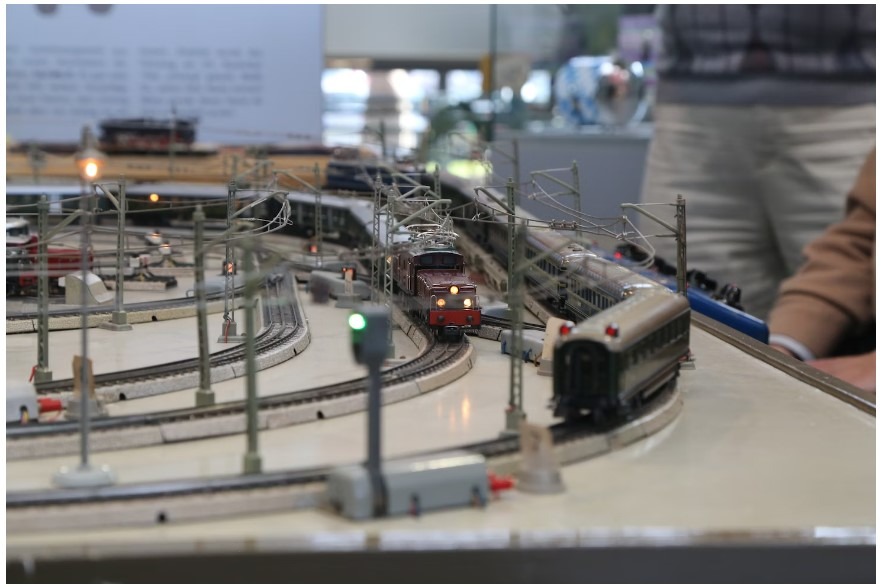
As exciting as it is to set up a functioning model train along with its associated railway tracks, the look can never be really complete without any scenery around it to give it that coveted artistic perfection. Sure, watching your trains whiz along the tracks, flawlessly switching to adjacent tracks and completing a circuit without colliding into another train is exhilarating, but it all begins to look bland after a while if there isn’t any personality to the whole system.
Any appreciated model train set is bound to have some beautiful scenery accommodating it, because without it there isn’t much to look at for too long. Thus, the scenery and landscaping around a model train set is something serious model train hobbyists put a lot of thought and effort in to. You could build a model train set and then create some scenery around it, or you could plan out the landscape and surrounding environments first and then build a model railway set that enhances the feel of the whole thing.
Model Train Scenery Doesn’t Have to Be Difficult or Expensive
You might look at some of the more acclaimed model train sets renowned in the model train community and think that there is no way you could emulate that, but you’d be surprised at just how far you can go. For clarity’s sake, yes; those model train sets are amazing results of a labor of love. But they don’t have to be the end all be all for you. You can also get creative and model famous places like famous cliff views, scenic mountains and more.
You can achieve similar breathtaking results if you put your mind to it. There exist so many easy to use kits you can find in hobby stores that make landscaping around your model train set as easy as counting to ten. And what’s more; you don’t necessarily have to buy a product to landscape for your model set. You can just as easily use items you collected yourself. What’s to stop you from using actual rocks and dirt for your landscaping needs? It all depends on what the end result looks like in your mind’s eye.
Using Starter Kits
If you’re relatively new to the world of model trains, using a starter kit for your model scenery is a good choice. Starter kits can be found at your local hobby store, and the quality of the contents inside can generally be determined from the kit’s cost, though reading up on some reviews for that particular kit beforehand is generally recommended as well. These model scenery kits can include all sorts of items, and the kind you get highly depends on the type of scenery you’re wanting to create.
You’ve got simple little kits that just include a handful of props; these can be small rocks, trees, a few car models, and a few miniature houses or other types of buildings. These types of kits are excellent for set dressing – if the quality of the contents inside is not bad – because they save you a lot of time from having to make things from scratch. In fact, higher quality kits are used in more professional model train sets as well, just because of the included props (like cars and animals) that are too difficult to create by hand.
Then there are the model scenery kits that can include something more specific to help you give your whole model a more authentic feel. Premade landscapes are sold, for those wishing to build a model train only and are happy with doing so around a landscape they did not personally create, and so are small kits that provide you with authentic replicas for natural things like grass, rocks, and trees. You can get carpeted grass, material that can be sprinkled on freshly painted landscapes to stick and look like grass, and just small plumps of fake grass and shrubbery that you can plop down anywhere you like. Rocks are simple enough that they don’t need much explanation; merely put down the props wherever you desire. And trees and the like can simply be fitted wherever you want to give your model a much nicer look.
Building Model Scenery by Hand
If you want to personally create everything, or at least want to sculpt the landscape to exactly the shape and size you want, you’re going to have to use one of multiple methods to create the landscape (unless of course, if you want to try out a new method of your own design). But before we even begin, it is crucial that you stock up on plaster cloth. This is the common defining feature shared among all the methods of landscaping, and should be available at your local hobby store.
Before we get to discussing the various methods of landscaping, let’s first talk about how to use plaster cloth properly so we don’t have to explain later on. Plaster cloth is supposed to be cut into pieces, ideally around 10 inches in length give or take. Every individual piece is then supposed to be dipped into a pan of water for only a few seconds, just enough to allow the piece of cloth to get soaked. You then remove the piece by holding it from both ends. This piece is then immediately placed on whatever landscape framework you have made, and then the process is repeated. The following piece is then placed on to the framework, just close enough to the previous piece to slightly overlap it.
The Foam Sheet Landscape Method: One of the best methods for getting your landscaping exactly right; the foam sheet method makes use of, understandably, sheets of foam. You outline whatever hill, mountain, or other type of terrain you want on one sheet, and then cut out the sheet. You then place it on another sheet of foam, outline the exact shape, but then cut out a slightly smaller piece. Keep repeating the process until you have enough cuts of foam sheet to stack on top of each other and form whatever type of terrain you wanted. If you want, you can then file the whole thing to get it to look exactly as you pictured it. Once done, use the plaster cloth method above to cover the whole thing in plaster cloth until it all looks like terrain without any missing gaps in between.
The Chicken Wire Landscape Method: For this you’re going to need chicken wire. For the oblivious, it is a thin mesh of metallic wires that is quite easy to bend with just your hands. This method is extremely simple for creating terrain without any extreme elevations. Simply cover your whole model area in chicken wire, bending it wherever desired to achieve the terrain look you want, and then cover it with plater cloth to finish up.
The Cardboard Strip Lattice Landscape Method: A bit harder than the two methods yet discussed, this method involves cutting a lot of cardboard strips at least an inch or two wide and as long as possible. These strips are first vertically hot glued across the whole model area with small gaps between them, with only their tips being hot glued and the rest of their body being twisted and bent to form a shape resembling terrain, and then the process is repeated horizontally. But this time with the strips of cardboard either interweaving with the vertical strips, or being glued or stapled to them to form a large web of cardboard strips. When complete, bend and reshape the whole web to however you wish the terrain to look like, and then cover in plaster cloth.
The Wrapped Newspaper Landscape Method: Probably the easiest method that still manages to produce impressive results, this method simply involves taking a lot of newspapers and crumpling them up into balls with rounded tops and rather flat bottoms. These crumpled balls are placed in top of each other over the whole model area according to whatever shape of terrain you want, and are then held in place with packing tape. Once secured properly, the whole thing is then covered in plaster cloth.
Circular Foam for Flat Landscape Method: This method is a very easy once just in case the landscape you want to design doesn’t include any hills or mountains but you don’t want it to be unnaturally flat either. Simply get some circular cuttings of Styrofoam and place it all over the model area with some stacks being slightly higher than the others. When done, just cover it all up with plaster cloth and you’re done.
Polyurethane Mountain Landscape Method: Technically a part of the ‘buyable kits’ category, polyurethane mountain kits aren’t exactly premade mountains. Instead, the kits come with two liquids that are mixed together and then the mixture is poured over the place you want to build a mountain. The mixture quickly forms into a foamy material that is incredibly easy to sculpt with a knife, and is one of the easiest ways to quickly include some mountains into your model landscape.
Most of the methods mentioned above can also be used to create realistic tunnels. For example, with chicken wire or the cardboard latticework methods, all you have to do is leave an opening in the plaster cloth, but also cleverly hide the edges. Shape the entrance and exits a bit to make them look nicer, maybe stick some decorative items like small pebbles on them to make them look like properly constructed tunnels, and you’re done. Of course, remember to keep the tunnel wide enough to actually accommodate your train so you can avoid an embarrassing crash.
Painting the Newly Created Scenery
Of course, all that covering of plaster cloth doesn’t make your model look like it has scenery. It just looks like discarded, unshapely junk. After you’re done with all the needed bending and twisting of the landscape framework, you need to paint it all over for it to actually resemble real life locations. Latex paint is recommended, though something else might work for you too.
It is also highly recommended that the paint be diluted first with water. This helps it to evenly cover the whole plaster clothed area rather than allow gaps in the surface. Once you’re ready to paint, experiment away from your model to decide which colors really make the whole thing pop and come to life. The lighting of the room you’re in impacts the look of the end result of course, but it is also necessary to not overdo anything. It is recommended to use a slightly lighter color for the soil, because the end result looks much more lifelike.
Then comes the painting of the rocks, as well as shading. If you didn’t go for premade rocks, choosing which shade of paint accentuates the color of your model soil is also a case of slight experimentation with the earthier tones of paint that you have. Shading, though not necessary and slightly more difficult than simple painting, can really make your whole model look leaps and bounds better than it did before. This, naturally, only holds true if the shading is done right. Remember to not overdo it, both in terms of the size of the shadows as well as the darkness.
Populating the Whole Place with Props
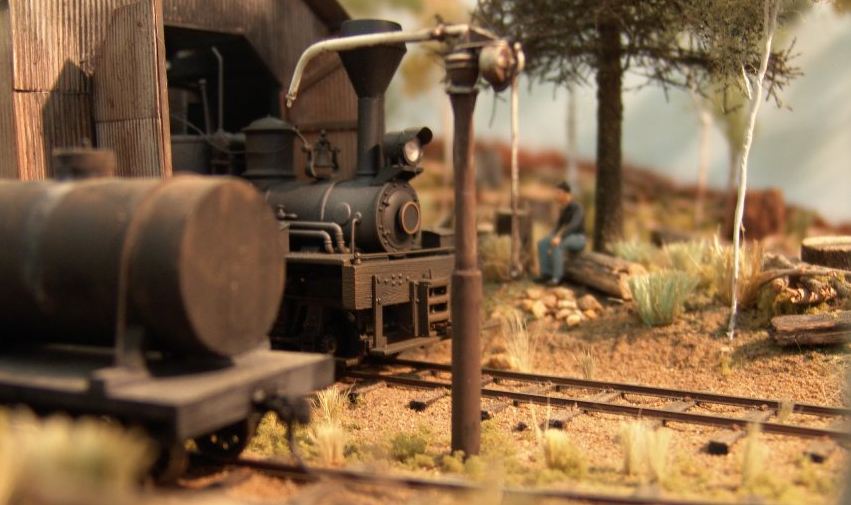
Once you’re all done with the landscaping, painting, and the laying of the model tracks themselves, it’s time to populate the whole thing with props that you’ve either bought or made yourself. Trees and animals are expected around the whole place apart from wherever you create the station or town that the train stops in. People, cars, parking lots, stop signs, roads, stores, and houses are all items you can buy pretty good props of.
The thing to remember when placing these all down is to not overdo it. If you’re modelling the whole thing after some real place, it’s a nice idea to look up some pictures of the place to refresh your memory before you start placing down anything. Also worth remembering of course, is the scale of everything you’ve made. Make or purchase props that scale properly with the train, the tracks, the landscape itself, and the other props. Nothing more immersion-breaking than a giant human standing next to a train that looks way too small for him.
Conclusion
And that’s it. We know it seems like a lot of work; every new thing you try does. But it won’t be long before creating model landscapes becomes second nature to you. Just try your hand at the different methods of landscaping, or perhaps even combine more than one, and then stick to whatever you think you’ve got the hang of most and looks the best in your opinion. Meanwhile, don’t forget to keep good care of your model train and your model tracks if you want all your landscaping to actually mean anything.