Creating Faux Stained Glass Window Art With Glue
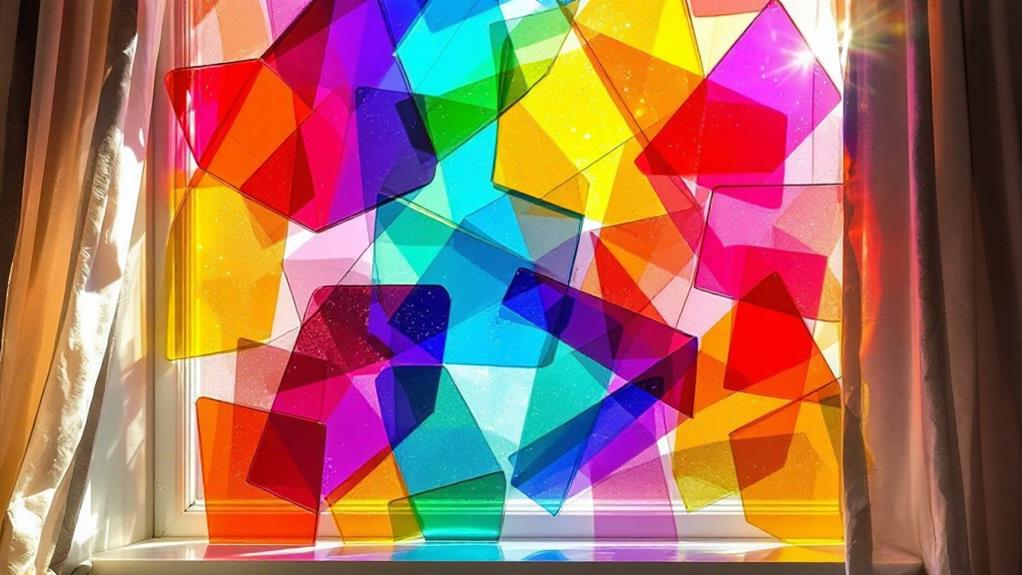
Creating faux stained glass window art with glue is a fun and rewarding DIY project. You'll need a glass or acetate base, black and clear glue, food coloring or alcohol inks, and basic art supplies. Start by designing your pattern and tracing it with black glue. Once dry, fill in the sections with colored glue mixtures to achieve a translucent look. Allow the piece to dry completely, which can take up to 48 hours.
Finally, display your artwork on a window or frame it for a stunning decorative piece. With a bit of patience and creativity, you'll be amazed at the professional-looking results you can achieve.
Materials and Tools
To create stunning faux stained glass window art, you'll need a variety of materials and tools. Start with a sheet of glass or acetate as your base. You'll use two types of glue: Gorilla Glue Wood Glue and Gorilla Glue Clear Glue. The wood glue, mixed with black food color paste or gel, will form the "leading" that outlines your design. Clear glue, combined with liquid food colors or alcohol inks, will fill in the colored sections.
For your design elements, gather colored cardstock or construction paper. You'll also need a paintbrush for applying glue, scissors for cutting shapes, and a ruler for precise measurements. Black food color paste or gel is essential for creating the dark outlines, while liquid food colors or alcohol inks will add lively hues to your artwork.
To begin, cut your colored paper into the shapes and sizes needed for your design. Arrange these pieces on a flat surface to plan your composition. Once you're satisfied with the layout, apply glue to the back of each paper piece and position them according to your plan. This process will bring your faux stained glass window art to life.
Designing Your Pattern
Creating an eye-catching pattern is the foundation of your faux stained glass project. Begin by sketching your design on paper, considering the size and shape of your window frame. Opt for simple geometric shapes or more intricate designs, depending on your skill level. Once you're satisfied with your sketch, transfer it onto your chosen surface using a pencil or marker.
When designing your pattern, keep these emotional aspects in mind:
- The joy of bringing your imagination to life
- The satisfaction of creating a unique piece of art
- The excitement of altering a plain surface into a stunning focal point
Remember that the lines you draw will guide your Faux Stained Glass project, so make them clear and deliberate. Consider the flow of your design and how different colors will interact when placed side by side. If you're new to this craft, start with larger sections that are easier to fill with paint.
Once you've finalized your pattern, you're ready to begin outlining. Use black puffy paint or a similar product to trace over your pencil lines, creating raised borders that will contain the colored paint in the next step.
Creating the Black Glue Outline
With your pattern designed, it's time to bring it to life with a black glue outline. You'll need to create your own black glue mixture by combining white school glue with black acrylic paint. This homemade solution is a cost-effective alternative to store-bought imitation lead strips and works perfectly for outlining your design.
Place your clear glass or acrylic sheet over your paper pattern. Using the nozzle of the glue bottle, carefully trace the lines of your design with the black glue mixture. This method allows you to create clean, uniform black lines that will flatten as they dry. If you prefer more precision, you can use a small brush to apply the glue mixture.
The black glue outlines serve as a sturdy foundation for your faux stained glass project. They'll create distinct sections for you to fill with color later. It's essential to let the black lines dry overnight before proceeding to the next step. This guarantees that your outline is completely set and won't smudge when you add the colored elements to your design.
Applying Colors to Sections
Once your black glue outline has dried completely, it's time to bring your design to life with lively colors. Mix clear school glue with drops of acrylic paint to create your own stained glass paints. This mixture will give you the perfect consistency for filling in each section of your design.
Using small paintbrushes, carefully apply the colored glue mixture onto the glass, staying within the black acrylic paint lines. Think of it as a fun coloring experience, similar to working in a coloring book. For a more authentic stained glass look, apply multiple layers of the colored glue, allowing each layer to dry fully before adding the next.
As you work on your faux stained glass magnum opus, you'll experience:
- The joy of seeing your design come to life with radiant hues
- A sense of accomplishment as you create a professional-looking piece
- The satisfaction of crafting a beautiful artwork without needing advanced skills
The layering process creates a blurry, translucent effect that mimics real stained glass. Take your time with each section, and soon you'll have a stunning piece of faux stained glass window art to display proudly in your home.
Drying and Setting Process

After applying the colored glue mixture, patience becomes your greatest ally. The drying process for your faux stained glass creation can take anywhere from 24 to 48 hours, depending on the thickness of the glue and environmental conditions.
During this time, it's essential to keep your artwork in a flat, dust-free area to guarantee even drying and prevent any debris from sticking to the wet surface.
As the white glue dries, you'll notice it becoming clearer, allowing the vibrant colors to shine through. Don't be tempted to touch or move the piece during this time, as it can disrupt the smooth surface you've worked hard to create.
Once completely dry, your faux stained glass will have a translucent, glass-like appearance.
To protect and display your finished artwork, consider framing it. Carefully remove the dried piece from its original surface and place it in a frame with a clear backing. This won't only preserve your creation but also allow light to pass through, mimicking the effect of a real stained glass window.
Displaying Your Faux Stained Glass
Now that your faux stained glass project is complete, it's time to showcase it in all its splendor. You have two main options for display: in a window or on a wall. For window display, use tacky putty or double-sided tape to attach your creation to the glass. This method allows light to shine through, revealing the vibrant colors and creating a stunning stained glass effect.
If you prefer wall display, frame your piece or adhere it directly to the surface. This creates a decorative element that casts colorful reflections in the surrounding area. Placement is essential, so choose a spot with ample natural light to achieve the desired appearance. Proper lighting, whether natural or artificial, highlights the depth and texture of your faux stained glass, making it an eye-catching focal point.
To enhance your display:
- Use a small, clear school frame for a sleek look
- Create a unique frame from thrift store finds
- Add a craft blade-cut mat for a professional finish